The best way to use new update to Luminar

Bottom line first
The bottom line is you can’t go wrong with this software for $59 (€59 for those in Europe) Even if you use it solely as a plug-in, it has some filters that make it worth the price: Some of my favorites are Golden Hour, Accent – AI Filter (new with this release), and Polarizing Filter. They also have some unique effects filters like their Orton Effect that are pretty cool.
Of course you can also use it stand-alone and as a raw processor. Read on if you want to know more about this.
***Use this link and coupon code WOLFSON to get Luminar Neptune for $59 (€59 Europe) or download the trial***
My Approaches: Fuji X-Trans and everyone else (Canon, Sony, Nikon, M43)
If you don’t use Fuji cameras you can skip to the section below Sony, Canon, Nikon, Micro 4/3. You will still want to try my sharpening preset even if you don’t have a Fuji camera (instructions at the bottom.)

Fuji Users
I have to say I was pleasantly surprised by this update. I’ve liked their intuitive interface from the beginning but I’ve only been using Luminar on a limited basis. Why? Because one of my primary camera systems is the Fuji X system and quite frankly, Luminar’s previous versions didn’t do a very good job of processing Fuji X-Trans raw files.
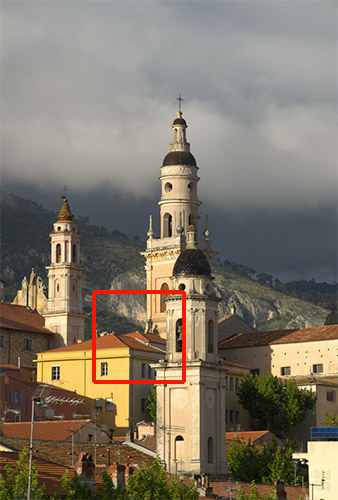
BUT now it appears they do! Right out of the chute the images looked soft and the lossless compressed a little softer than uncompressed. At first I couldn’t imagine the amount of sharpening needed to overcome the softness would work without big compromises. However, I came up with a custom sharpening preset that does a really good job (see at the bottom for info to get my preset for free.) I admit I’m a little surprised it can even work as well as it does but so far it works well!
Fuji option 1
Right now Lightroom doesn’t do a consistent job processing Fuji X-Trans files. It just doesn’t take full advantage of the fabulous Fuji raw information. So I start in ON1 Photo Raw which will apply lens corrections as well as any other processing I want to do. Then I use the “Send to Other Application…” option to send it on to Luminar to make use of its unique and cool filters.
Fuji option 2
Just open your file directly in Luminar (now v2018) and use my preset for sharpening the file (below.) Then go ahead and create more layers and use all the cool filters, layers, and tools right within Luminar for a one-stop approach.


Sony, Canon, Nikon, Micro 4/3
My workflow with my Sony and my other files (Canon, Nikon, Panasonic, Olympus) is to process my raw files with lens corrections applied along with other processing I choose, using ON1 Photo Raw or Lightroom and then send them to Luminar so I can use some favorite filters like Golden Hour and Accent – AI Filter (new with this release.) I’ve tested my sharpening preset with all of these brands of cameras and it works quite well.
Integration with other Skylum (formerly Macphun) plug-ins
Once you are in Luminar you can now integrate it easily with the other Skylum plug-ins such as Tonality (a personal favorite), Aurora HDR, etc. Just in general Luminar is fun and very easy to use. It has the most intuitive interface out there.
Down the road
I talked with my technical contact at Macphun and he said they are working on lens corrections and perspective control tools for a future release. Although they are “recommending” using uncompressed files, I have gotten good results with my custom preset for sharpening lossless compressed Fuji RAF X-Trans files.
Conclusion
I think no matter what your favorite programs and plug-ins are for image processing, Luminar has enough unique features, coupled with a fantastic interface to make the modest price to acquire it, well worth it.
***Use this link and coupon code WOLFSON to get Luminar for $59 (€59 Europe)***
You can also use this code to save $10 on Aurora HDR
My Fuji X-Trans sharpening preset (also works well for Canon/Sony/Nikon/Micro 4/3): If you want my preset for free, just sign up for my newsletter and then let me know by sending me an email. I’ll then send you the preset along with instructions.
Happy Shooting!
Joel
 Joel Wolfson is an internationally published photographer who loves teaching as much as shooting. He shares his 30 years of experience as a working pro with other photographers and enthusiasts by way of his workshops, 1 on 1 training, webinars, articles, blog and speaking engagements. His technical articles have been translated for use in more than 30 countries yet he is best known for his artistic images of nature’s fleeting moments and unexpected views of everyday places around the globe. He is one of the pioneers of digital photography having conducted digital photography seminars for Apple and other corporations starting in the early 90s. His roster of notable clients includes numerous publications and fortune 500 companies. He currently works with great affiliates like Arizona Highways, Topaz Labs, ON1, and Macphun to have more avenues for working with those wanting to pursue their love of photography. His goal is to make learning and improving one’s photography easy, fun and rewarding.
A note about product links and affiliations: Some of the links I provide are affiliate links which means I get a small commission, with no additional cost to you, if you click it and end up buying something. It helps keep the lights on as well as supporting this blog and my other free educational resources and articles. So if you use them, thanks! It is always my goal to report my results in a straighforward manner whether or not it favors a particular product.

Please how can I install the preset into Luminar after I downloaded it.
And how can I find it in the presets once installed?
Hi Ursula,
I’m glad you found my article useful enough to want to download the preset.
Just launch Luminar, open any image and go to the File menu.
File > Show Presets Folder… Then you can just drag the preset into that folder. It will update in real time and you can use it right away. It should show up in the User Presets in the Preset panel across the bottom.
Hope this helps.
Cheers,
Joel
Hi Joel,
Thank you for your prompt reply. I now managed to get it into the folder. Strangely enough it resides under “custom”, but at least I know how to find it.
Greetin gs Ursula