Joel Wolfson Photographic Artist

  • Home
  • About Joel
  • Workshops
    • U.S. Workshops
    • International Photo|Non-Photo
      • Photo
      • Non-Photo
    • Brochure
    • FAQs
    • Past Workshops
    • Testimonials
  • Galleries
    • Latest
    • Southwestern U.S.
    • Overseas
    • Infrared
    • Black & White
    • People
    • Different
  • For Photographers
    • Discounts Favorites Links
    • Learning
    • Videos
  • Blog
  • Testimonials
  • Contact
You are here: Home / Reviews / Awesome New Plug-in from Topaz- Texture Effects

November 11, 2015 by Joel Wolfson Leave a Comment

Awesome New Plug-in from Topaz- Texture Effects

Awesome New Plug-in from Topaz

Texture Effects– Quick Look Review

NEW: Topaz just updated Texture Effects.

©JWolfson_Vendemia_Toscana_AmbroAged_500px
In addition to a Basic Adjustment layer I used Edge Exposure, Dust/Scratches, and Texture layers within Texture Effects to create this vintage look reminiscent of a tintype. It only took a few minutes. Historically tintypes and early methods of creating round bales of hay do overlap. I’m not entirely sure the hay bales looked exactly like this but I like the timeless feel I was able to achieve in Texture Effects.

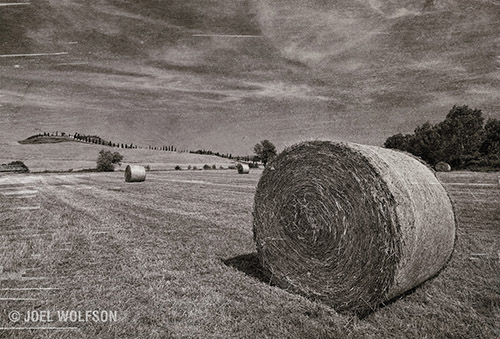
Texture Effects, Topaz’s latest plug-in (also operates stand-alone) is the easiest way to add textures and a whole lot more to your images. It’s a huge time saver over creating textures in most other programs. In addition to hundreds of fantastic presets, you can also customize them or make your own.

Although there are numerous great presets to use as a starting point I did this one from scratch. In the texture layer I adjusted the size of the texture (oval shapes that mimic the balloons) as well as moving it to highlight the face. Again it was very quick and easy to create this. I saved it as a preset in case I want to use it again.
Although there are numerous great presets to use as a starting point I did this one from scratch. In the Texture layer I adjusted the size of the texture (oval shapes that mimic the balloons) as well as moving it to highlight the face. Again it was very quick and easy to create this. I saved it as a preset in case I want to use it again.

It has a great interface that builds on the innovation they showed in Glow and Impression. It’s really easy to add adjustments and effects via layers, each with its own mask. You can add as many layers of adjustments or effects as you want and save off any combination as your own preset.

Here's a before (left) and after (right) where I started in ReStyle. In ReStyle, a really fun plug-in, you can choose your color palette so I used it to get vivid purple and yellow. Then I hopped in to Texture Effects and used a Texture layer to create the corrugated metal look for the wall and a Light Leak layer to make it look like a spot of sun reflected on the wall. I used the masking available in each layer to isolate it. In the end only two layers plus a Basic Adjustment layer and a few minutes to make this image.
Here’s a before (left) and after (right). I started in Topaz ReStyle. In ReStyle you can choose your color palette so I used it to get vivid purple and yellow. Then I hopped into Texture Effects and used a Texture layer to create the corrugated metal look for the wall and a Light Leak layer to make it look like a spot of sun is reflected on the wall. I used the masking (available in each layer) to isolate the “sun” reflection. In the end I used only two layers plus a Basic Adjustment layer and a few minutes of my time to make this image.

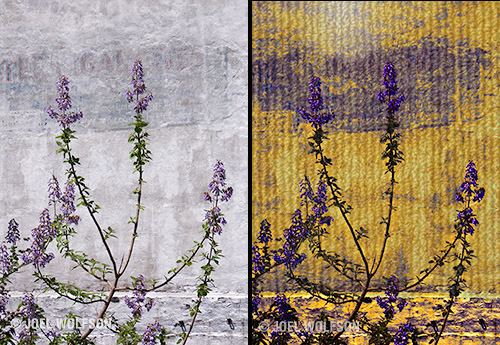
Topaz has also set up a community cloud that allows you to share or download presets with the click of a button right within the program.

Here I was going for a Polaroid transfer look. I used a Texture layer for the overall mottled look and a Dust/Scratches layer for the peeling marks. I was even able to add the bluish color right within the layer. Then a little Edge Exposure for good measure. I'm really impressed by the intuitive interface.
Here I was going for a Polaroid transfer look. I used a Texture layer for the overall mottled look and a Dust/Scratches layer for the peeling marks. I was even able to add the bluish tint of the peel marks right within the layer. Then a little Edge Exposure for good measure. I’m really impressed by the intuitive interface.

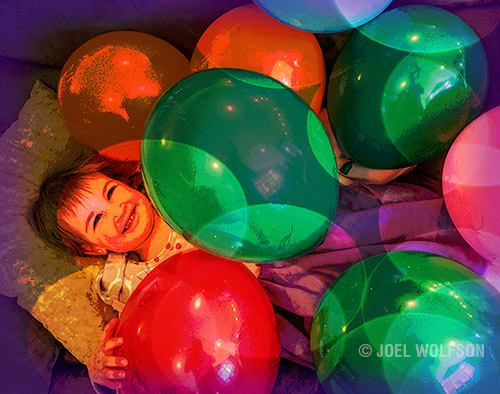
Topaz obviously worked very hard to come up with a really intuitive interface. This combined with the hundreds of presets that come with Texture Effects and inevitably thousands more via the Topaz Community cloud, really makes it easy and quick to produce great results with your images. Not to mention a lot of fun!

Hope you enjoyed my quick review.

Cheers,
JoelButton bar for blog BLUE

Filed Under: Reviews

« Sony A7R II Sealed The Deal- My preference for mirrorless over DSLRs
Is The Mirrorless Honeymoon Over? »

Leave a Reply Cancel reply

Your email address will not be published. Required fields are marked *

Be the First to Hear the Latest from Joel

100% safe and confidential.
We never share your info.

Search Posts

Categories

  • Articles
  • Behind The Images
  • Fine Art
  • Fuji X Professional System
  • Infrared
  • Photo Tips and Techniques
    • Learning
  • photography
  • Reviews
  • Travel
  • Workshops

Archives

Phone: (928) 526-3726
Email: info@joelwolfson.com

Copyright © 2023 · Executive Pro Theme on Genesis Framework · WordPress · Log in