Woohoo! Lens corrections, new sharpening, improved highlights and more…
UPDATE: Initially this review was based on a near-final pre-release for a peek ahead. I have now updated it to reflect additions and changes in the actual release. I’ve noted my significant changes and done them using this maroon type.
ON1 released their latest major update to Photo Raw 2017 on June 7th. It has lots of useful features for everyone, which I cover, but I’m also focusing on those pertinent to Fujifilm users.
Better sharpening for X-Trans
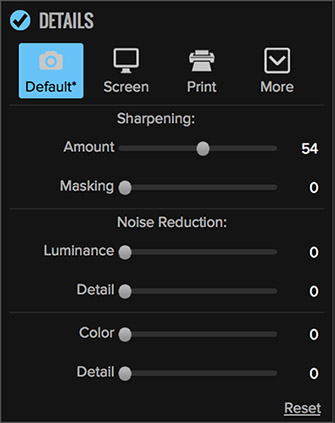
The new Details panel found in the Develop module works well for capture-sharpening with raw X-Trans files. Previously the only option was the Sharpening panel in the Effects module and it was a bit tricky getting the right type and amount of sharpness for capture sharpening. The X-Trans sensor has no AA filter and yields pretty sharp images at the outset but still requires capture sharpening to get the most quality out of the sensor.
The new Details panel makes it easier to make the subtle changes required. There are 2 sharpening sliders: Amount and Masking. I ended up only using the Amount slider in most cases. I found most images can handle quite a bit of this type of sharpening. The 50-80 percent range is not unusual.
The masking slider is not as subtle so if you use it at all you’re likely to be in the 1-3 range. Like LR, you hold the option key while you move the sliders. Because the masking slider goes to 100 I suspect the touchiness at the low end of the scale is just something I’m seeing in the pre-release. However, it can still be used as-is.
Woohoo! Auto Correction for Fujinon lenses
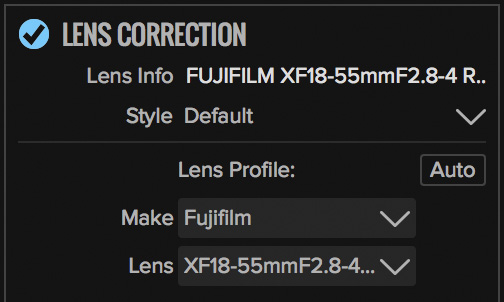
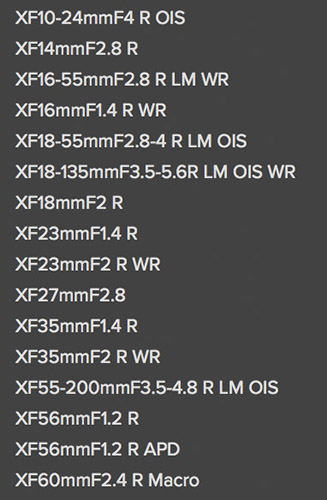
One of the biggest requests I heard voiced from those of you that read my review of the initial Photo Raw 2017 was built-in lens correction for raw X-Trans files. Well, ON1 listened and they have implemented several of the Fuji lenses. With the pre-release there were seven XF lenses and now that’s up to sixteen XF lenses with the release.
Above is the list in the pulldown menu of the Lens Correction module within Photo Raw 2017.5. Not shown above but also included are both versions of XC zooms.
UPDATE: Since the release of the golden master on June 7th, ON1 added nine more Fujinon XF lenses! I’m sure there are a few more that some Fuji users would like to see added but this is a great start.
Smartly, for lens profiles not provided, you can save your own set of lens corrections within the panel which ON1 calls a “Style”. Just for example purposes I used the pre-release to create a Style for my XF 14mm f2.8 which by the laws of physics has significant light falloff. Once created, it goes in the pulldown menu for future use. See below for a sample of a “before” and “after” of using my custom corrections.
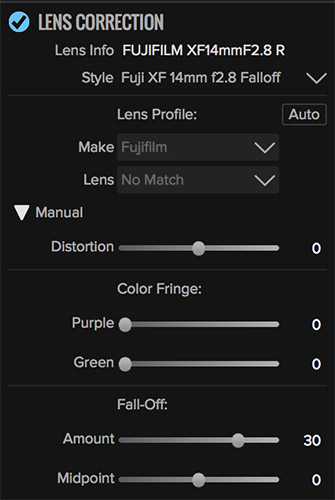


You can turn the built-in lens corrections off if you want to use the base file, unlike Lightroom where it is applied automatically with no option to turn it off. This may give you slightly more image area but without the Fuji corrections.
X-Trans Highlight improvements
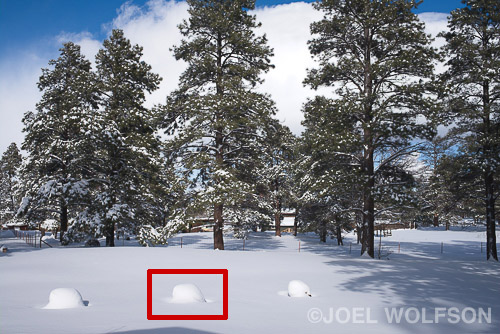
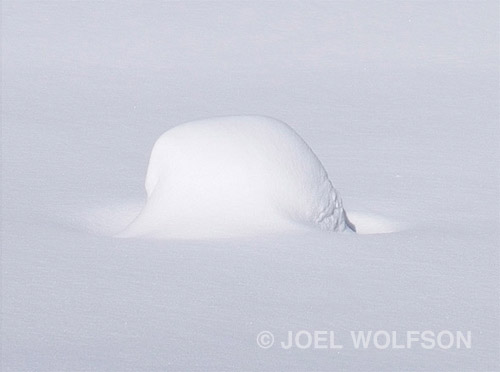
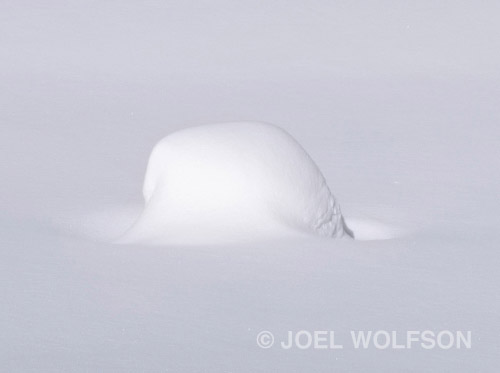
The highlight slider has been improved for adjusting highlight areas of X-Trans files. This may have been an issue in general but I was told by ON1 it was a particular issue they worked on for X-Trans files. If you look at my examples which are 100% crops with the snow mound in bright sun you see a nice smooth gradation in the tones. In this case I moved the highlight slider up to 42 just to see if it would posterize, which it did not. I processed the same file with Iridient for comparison. You’ll notice that the ON1 version still retains fine detail with the highlight slider engaged, even in this extreme example of snow in open sun. In addition to the improvement from ON1, this is also a testament to Fuji’s sensor.
**Use this link and the discount code jw17on1 to get 20% OFF ON1 Photo Raw!**
Raw processing improvements
Scrutinizing files at 100 percent or more seems to be standard for evaluating acutance (“sharpness”) and artifacts but it’s a two edged sword and must be considered in context. If you scrutinize actual prints, even large ones, you will never see the same level of detail as pixel peeping at 100%, and you discern even less detail at normal viewing distances. The other big factor is you must consider all of your needs, such as workflow, ease of use, the value of your time, color accuracy and preferences, your final use/output, etc.
Considering all of the factors I just mentioned, ON1 Photo Raw 2017 continues to be a top choice for processing Fuji X-Trans files. In fact I’ve seen even more improvements since the last time I evaluated it.
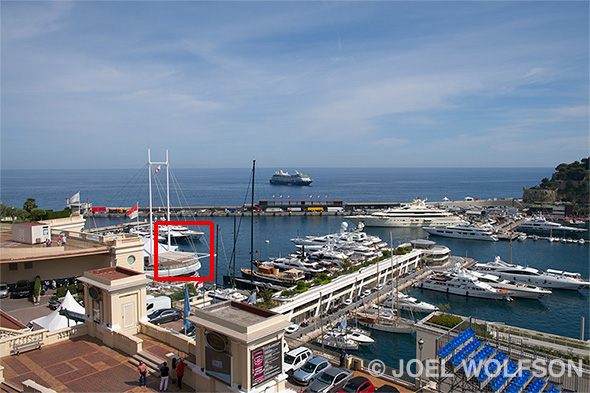
Take a look below at the photo of the marina in Monaco. I chose this one because there are lines at all different angles (circular rails, masts and mast cables, etc.) which is one of the bigger challenges for processing raw files. I’m not sure every angle is covered here so your mileage may vary but so far it looks like some of the previous jaggy line issues have been improved.

Cool and useful new features
There are several notable new features in this update of Photo Raw that aren’t necessarily Fuji specific but still very useful. More importantly they take ON1 closer to my hope and I believe their goal, of having a solid stand-alone package for image processing and management that can also be a viable alternative for Lightroom or Photoshop/Bridge/ACR. Here they are:
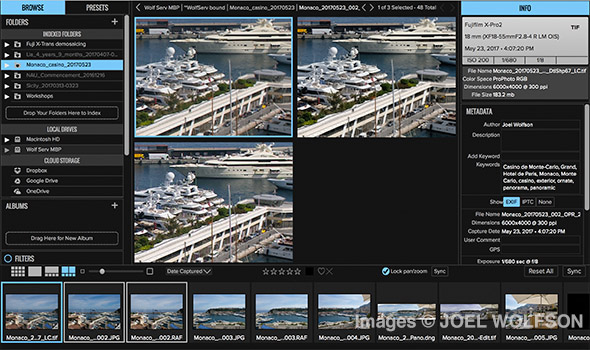
• I consider a Compare mode an essential feature and it is now part of Photo Raw 2017. This one definitely bests Lightroom’s compare mode because you can zoom in with images synched together so you’re looking at the same part of all the images. Yes, I said all, as in more than 2, or as many as you want! Although LR has a “Survey” mode where you can make choices among several images you can’t zoom in on them. If you’re just using it for culling that’s not a big deal but if you’re trying to scrutinize more than 2 of the same (or similar) images it’s great to be able to zoom in on all of them at the same time and in the same place on the image. It is also much simpler having it all in one place too. I should mention that if you go above 50% when viewing multiple images the raw images won’t have full resolution. ON1 does this for speed purposes. I think it’s a smart tradeoff as it only affects raw files above 50%. At any time you can go back and forth between raw images at 100% in regular browse mode. This doesn’t affect JPEG, TIF, etc. Kudos to ON1 for an easy-to-use implementation of a highly useful feature.
• A good cloning tool is essential for a solid stand-alone image processing package. The retouch brush is fine for dust or facial blemishes but doesn’t hold up for cloning purposes. Well, now ON1 has added a real clone tool to Photo Raw 2017 (which doesn’t exist in Lightroom.) Until now it was necessary to go to Photoshop for real cloning capabilities. This will be a huge time saver.
• ON1 had brought back stacking presets and filters which is really handy. Once you’ve applied one preset or filter you simply make sure your top effect is selected (outlined in blue) or for that matter, wherever you want the new preset inserted in your stack. Then hold the option/alt key and click the next preset and voila it’s stacked with your previous one(s). You can also right-click or opt-click on a preset thumbnail to get a pulldown menu and select “Insert Preset”. You also see a preview of the effect in the preset thumbnails.
• There is a Lightroom Migration Assistant. This is a pretty big statement by ON1 speaking to using their Photo Raw product as a full replacement for Lightroom. Of course you don’t have to commit to a complete changeover as there is an option in the Migration Assistant whether or not you want to create a set of images processed using your Lightroom adjustments. The Migration Assitant should work well for maintaining the organization you have in Lightroom: Collections become Albums, Folders become Indexed Folders, and all standard metadata gets transferred including star ratings and color coding
For Lightroom’s flags which are non-standard and don’t get transferred I have an easy solution. You just filter all your files in Lightroom to show the flagged photos, select them all and then color code them all with the same color (preferably one you’re not currently using) and this information will get transferred. If you are using every standard color available then you may have to use a star rating or use your least common color coding.
Right now I use Photo Raw in conjunction with Lightroom and I’m not ready to dump Lightroom yet, at least not entirely because I have well over 150K images catalogued. Challenging Lightroom’s database, keywording, and search functions is a tall order. But I applaud ON1 for recognizing that many photographers don’t fully utilize the database in Lightroom as I do and all of us are frustrated with how slow Lightroom has become for dealing with images. The market is definitely ready for something like Photo Raw and a Lightroom Migration Assistant.
• Last but not least are several camera updates including compressed raw for the Fuji X100F
ON1 and their users
This is an extremely useful update for everyone and an extra bonus for Fuji users. I should mention that after using this new release, ON1 not only sought my feedback but spent a lot of time with me doing so. It’s obvious from this update they listened to their users’ requests. And based on my experience they are continuing on this path.
**Use this link and the discount code jw17on1 to get 20% OFF ON1 Photo Raw**
Happy Shooting!
Joel
 Joel Wolfson is an internationally published photographer who loves teaching as much as shooting. He shares his 30 years of experience as a working pro with other photographers and enthusiasts by way of his workshops, 1 on 1 training, webinars, articles, blog and speaking engagements. His technical articles have been translated for use in more than 30 countries yet he is best known for his artistic images of nature’s fleeting moments and unexpected views of everyday places around the globe. He is one of the pioneers of digital photography having conducted digital photography seminars for Apple and other corporations starting in the early 90s. His roster of notable clients includes numerous publications and fortune 500 companies. He currently works with great affiliates like Arizona Highways, Topaz Labs, ON1, and Macphun to have more avenues for working with those wanting to pursue their love of photography. His goal is to make learning and improving one’s photography easy, fun and rewarding.
A note about product links and affiliations: Some of the links I provide are affiliate links which means I get a small commission, with no additional cost to you, if you click it and end up buying something. It helps keep the lights on as well as supporting this blog and my other free educational resources and articles. So if you use them, thanks! It is always my goal to report my results in a straighforward manner whether or not it favors a particular product.

Thanks Joel,
This is a very handy review as I am teetering on the brink of getting the upgrade when it is available. As a Plus member I think I may qualify for a free upgrade.
Hi Anne,
You’re welcome and glad you found the review useful. If you already own ON1 Photo Raw you can get the upgrade free!
Cheers,
Joel
Hi Joel,
I´ve tried postprocess in ON1 Photo, but I have not got nice picture:
https://uloz.to/!IAM0lPCbtStc/on1-dsf0180-vzor-jpg
I sharpened *.raf on 45% and exported and opened in PS. That was all. You can see what I got from ON1 – it´s terrible. Can you tell me what is wrong?
I think, much better is Capture one 10 for fujipostprocess.
Best regards,
jaro
Hi Jaro,
It is difficult to tell what your goal is with the JPEG you provided. Does it look too sharp to you? Does it look not sharp enough? There are a lot of variables to consider when sharpening an image. A proper sharpening workflow: 1. Capture Sharpening 2. Selective Sharpening (optional) 3. Output Sharpening. Sorry if you already know this, I’m just trying to determine what you think is bad about your image and what your goal is.
If you are using the latest version of Photo Raw (2017.5) they have a two new panels in the Develop module: DETAILS and LENS CORRECTION. I have found the DETAILS module to generally have the best capture sharpening and easier to use than Sharpening panel in the Effects module. You can also gain a small amount of sharpness by turning off lens corrections but this will also take out other corrections.
Here are some options for you:
1. If it is not sharp enough overall there is nothing wrong with going up to 80 or 100 in Detail sharpening
2. If it is too sharp, just use a lower number on the slider
3. If it is a matter of balancing smooth areas like skin versus those with details (like eyelashes) then try using a setting of 1 or 2 on the masking slider
4. If you just want to isolate sharpening to eyelashes and lips which is very common for portraits you may want to use selective sharpening
If you already own and are using C1 10 and are happy with it for an overall workflow, then just continue to use that. It’s an excellent product. I haven’t used C1 since 9.x. It has a fairly big learning curve but another reason why I haven’t invested the time in it is this: PhaseOne’s commitment to Fuji has been inconsistent. For example, versions prior to 10 did not support lossless compressed. PhaseOne said they weren’t going to support it and then they reversed their decision (probably due to market pressure) and added it to v10. Whereas ON1 has been very enthusiastic in supporting Fuji users. For someone who doesn’t already own C1 it’s $300 versus $120 for ON1 Photo Raw.
If you own both it’s still worth owning and using ON1 for it’s numerous other capabilities besides raw processing.
Hope this helps.
Cheers,
Joel
Hi Joel,
thank you for your detailed answer, I appreciate It.
Best regards,
Jaro