You Don’t Have to Like HDR to Like Aurora HDR 2018

This is a short review of Aurora HDR 2018, with a twist.
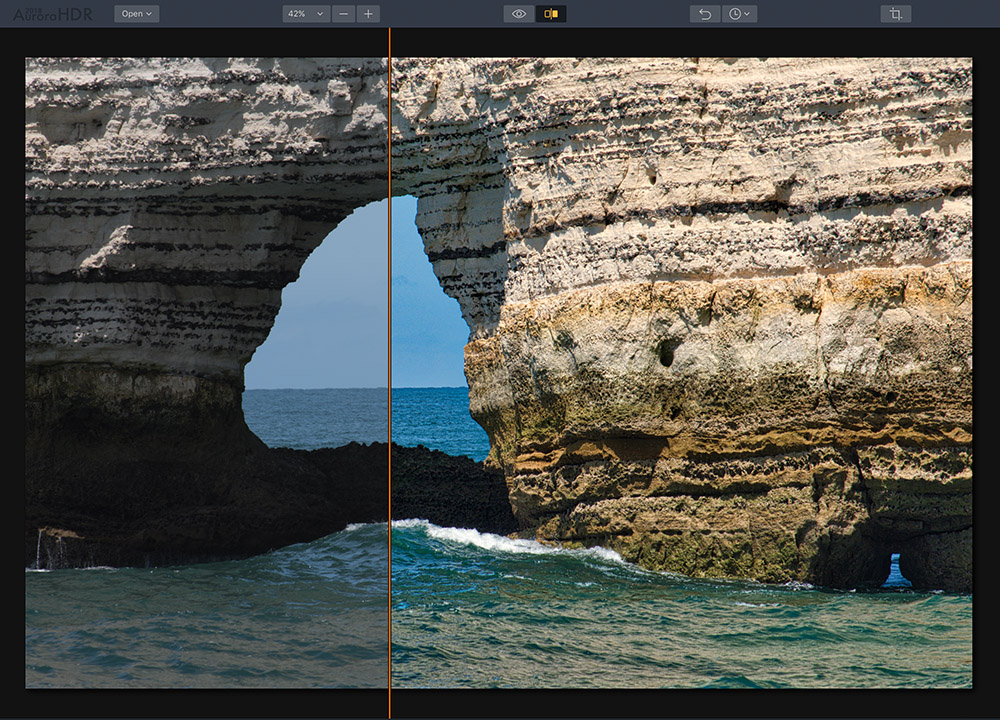
MacPhun sent me Aurora HDR 2018 a little early to try out so I could tell you about it. Why do I say my review has a “twist”? Because I’m not a fan of HDR, at least not the way most people use it. Aha! not the way most people use it… Guess what? This program has some really awesome features for many tasks that are not the usual HDR uses. In fact I’ve only been using it for single exposures and so far really liking the results.
This all new Aurora HDR 2018 is available to order for BOTH Mac and Windows. Use discount code WOLFSON for an additional $10/€10 off. And now Windows users can enjoy and make use of it too!
**It processes Fuji X-Trans RAW files nicely too**
Bottom Line First
The obvious question: Is it worth the money? The short answer is yes, but I answer this question with another question: Will it save me time often enough to spend the money? If you read the rest of my review you’ll see I look at this in terms of using it for single image processing and the answer is yes. Another bonus is that it processes Fuji raw X-Trans files quite nicely. In my opinion it’s hard to go wrong for $89/€89 ($49/€49 for existing users.) If you use multiple exposure HDR then you’ll get even more utility out of it. Naturally everyone has different needs so keep that in mind when deciding and you can always download the trial first and see how it works for you.
A New and Useful Option for Single Image Workflow
During my usual workflow, once I’ve made my selections of best images from a shoot, I go to my top picks and start processing them. Whether a landscape, architecture or a portrait, raw files need some optimization. As many of you have heard me say- raw is blah! Typically raw files need sharpening/detail work, contrast, saturation and in many cases bringing out shadow and highlight detail.
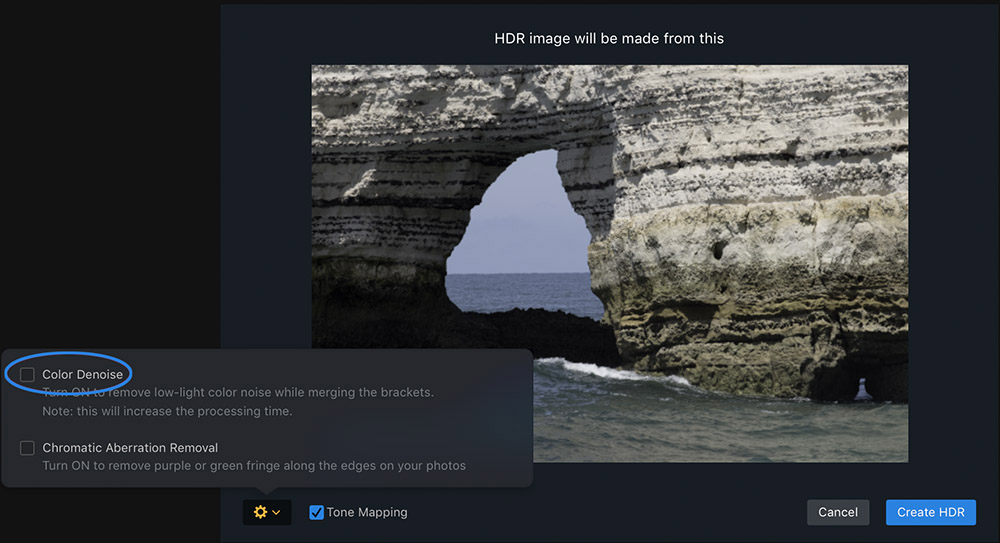
I start my typical workflow by doing my culling in ON1 Photo Raw. Depending on the image I may be able to do my adjustments right within Photo Raw. But after spending some time with Aurora HDR 2018 I have a new option that can save me time. I can simply right-click on the image and select Show in Finder, then drag and drop that raw file on to Aurora HDR 2018. I’m immediately presented with a small version of my image with a few options. I leave the Tone Mapping checked but I uncheck the Color Denoise option to speed up the opening/processing of the raw file and I end up with a nice starting point.

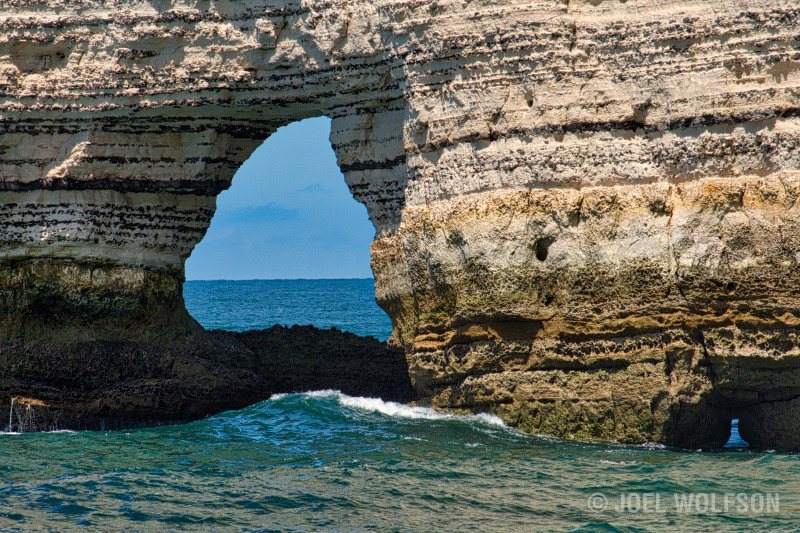
Here’s what I’ve realized using this method with single exposures: Right after I click the Create HDR button I’m presented with an image that is mostly optimized. For some images I click a simple preset I’ve made that adds some further optimization and voila! I’m done with most of my adjustments. **See below to get my preset for free (I also have one for X-Trans)**
What I like best about this 2018 version
The biggest asset for me is raw processing with tone mapping on the fly for single images. The initial amount of tone mapping it does is fairly subtle and works well for many types of images. It’s a nice starting point versus the extra work if you try to get there with the current (2017) version. I tried everything from landscapes to portraits. About half of them required my preset for some more optimization (Scroll to the bottom to see how to get my preset for free.) It’s also noticeably faster than the 2017 version.
I like that it handles Fuji X-Trans raw files and much faster than the older version (18 sec. to open a lossless compressed RAF versus 32 sec. for the previous version with my current system. Your own times may vary.)
I happen to have two camera systems that challenge raw processors: One is my Fuji system and the challenge is due to the nature of the X-Trans sensor and the other is my Sony A7R II which simply has very large files. The bottom line is your times may be better or worse depending on the type of file, complexity of the image, and your computer system.
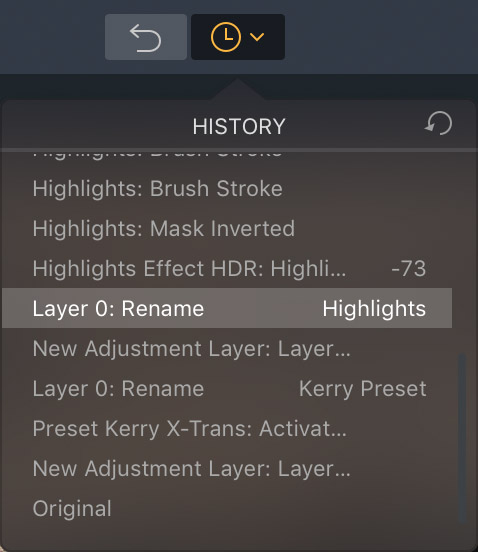
I also like the history panel. You can see all your steps and go back to any step you’ve done.

It has a friendly and logical interface with plenty of adjustment tools so that you usually won’t have to hop around to other programs to complete your image. They’ve added even more useful tools to this version like Dodge and Burn, Transform, and Lens Correction.
I love the export dialog. This may seem like a minor thing but it’s really handy to be able to resize on the fly, especially if you need smaller files for the web. Then you don’t have to go into another program to do it. Not to mention the export dialog is very simple and easy to use, especially compared to something like Lightroom.
What I don’t like
I have to qualify this because I’m using version 1.0 and by the time the official release comes out in a couple weeks as well as subsequent updates, this could change. That said, I think it could open/process raw files even faster, especially the Fuji X-Trans. Also, once you open a file, every time you move the image around at 1:1 and/or move a slider you have to wait 2 or 3 seconds for the processing to complete. This is with 20MP-42MP files from various cameras. These aren’t deal breakers but rather annoyances. No product is perfect so one needs to know about negative aspects too. But in the end there is far more to like about Aurora HDR 2018 than not and it makes a useful addition to my arsenal.

Here’s the official list of what’s new in Aurora HDR 2018:
- Next-generation Tone Mapping – A new smart Tone Mapping algorithm automatically reduces noise, and produces more realistic and natural initial results.
- Mac and Windows versions – Aurora HDR 2018 is available both for Mac and PC users, enabling mixed-computer households to share the same product key.
- Lens Correction Tool* – The new Lens Correction filter easily fixes all kinds of lens distortion, from barrel and pincushion to chromatic aberration and vignetting.
- Transform Tool* – Easily scale, rotate and shift your image to better fit your vision.
- Dodge & Burn Filter – Selectively lighten or darken specific areas of an image to artfully direct your viewer’s eye towards the key subject of your image, similar to a traditional darkroom technique.
- HDR Enhance Filter – Adds details and clarity to an image, adjusting colors, details and contrast without creating artificial halos or other problems.
- User Interface – A new, modern and responsive user interface brings a powerful, yet joyful experience to HDR photo editing.
- History Panel – An easy-to-reference list of edits made to your image, the History panel allows you to click on any editing step to revert the photo to an earlier stage of editing.
- Touch Bar support for Mac – Aurora HDR 2018 adds Touch Bar support to give new MacBook Pro users fast access to key editing features and speed up their workflow.
- Image Flip and Rotate* – Perfect for correcting photos with incorrect horizons or making creative compositions or other stylistic changes to an image.
- IMPROVED: New Structure Algorithm – The re-developed Structure tool allows you to adjust detail and clarity of an image to get a classic HDR effect with great detail or a smoother effect with less details.
- IMPROVED: RAW handling – An improved RAW conversion brings out more details in shadows/highlights, displays colors more accurately and reduces noise in RAW files.
- IMPROVED: Crop tool update – Now specify custom crop sizes for even more versatility.
- IMPROVED: Speed – Faster merging and masking performance, improvement in RAW image processing.
* Lens Correction and Transform tools, as well as image flip and rotate will be available in the Mac version at launch, and arrive in the PC version with the first free update in the beginning of October. Other tools and features that are currently available for Mac only would be added to PC version by the end of the year.
Summing it up
Although technically it’s made for multiple exposures, I find Aurora HDR 2018 not only useful for single exposures but a time saver as well. If you have single images and want to get the most out of the dynamic range then consider Aurora 2018. Part of my criteria for adding software to my arsenal is to gain efficiency in my workflow and this fits the bill for many of my images. I want to get more time on it but so far I find it useful, enjoyable and very reasonably priced.
Get my raw optimizer preset free
If want my preset for free, just sign up for my newsletter and then send me an email letting me know you subscribed and I’ll send you the preset.
*Fuji Users*: Ask for my X-Trans version of my preset. It’s a little more customized for X-Trans files in terms of contrast and color. If I were to give it a film simulation equivalent I’d say something between the Provia and Velvia simulations, so a little more punch rather than neutral. Of course you can always dial that back to suit your taste.
Happy Shooting!
Cheers,
Joel
Joel Wolfson is an internationally published photographer who loves teaching as much as shooting. He shares his 30 years of experience as a working pro with other photographers and enthusiasts by way of his workshops, 1 on 1 training, webinars, articles, blog and speaking engagements. His technical articles have been translated for use in more than 30 countries yet he is best known for his artistic images of nature’s fleeting moments and unexpected views of everyday places around the globe. He is one of the pioneers of digital photography having conducted digital photography seminars for Apple and other corporations starting in the early 90s. His roster of notable clients includes numerous publications and fortune 500 companies. He currently works with great affiliates like Arizona Highways, Topaz Labs, ON1, and Macphun to have more avenues for working with those wanting to pursue their love of photography. His goal is to make learning and improving one’s photography easy, fun and rewarding.
A note about product links and affiliations: Some of the links I provide are affiliate links which means I get a small commission, with no additional cost to you, if you click it and end up buying something. It helps keep the lights on as well as supporting this blog and my other free educational resources and articles. So if you use them, thanks! It is always my goal to report my results in a straighforward manner whether or not it favors a particular product.

As a Macphun Luminar license holder, I note that Aurora HDR is “almost” the same product. I hazard a guess that it shares the same codebase, so I wonder a) do I really benefit from Aurora if I already have Luminar? and b) why is there no discount for Luminar licensees?
Hi Paul,
Not being a programmer I can’t say how similar the 2 products are underneath. I know Aurora was a separate project with an HDR photographer and allegedly written from the ground up. The main benefit you would have from Aurora HDR is with scenes that have a large dynamic range such as landscapes, night scenes, or even portraits with high lighting ratios. If you had to pick just one, it would be Luminar as Aurora HDR is a bit more specialized and not as user friendly.
Regarding the discount, I don’t know. I can speculate that the reason they don’t offer a discount across the products is that they are already priced so low for what you get. Also Aurora HDR is a bit more specialized. If you watch the promotions- like right now you can acquire them quite cheaply (extra discount using code WOLFSON.) I think we have all become spoiled by the competition out there that gives us great products for very little money when you look back in time and/or at the Adobe alternative of perpetual payments. I figured out that I spent over $6800 buying the iterations of PS and LR with Adobe. And all this before starting my subscription for which I’ve already spent several hundred dollars. So it’s all relative!
It’s up to you if you want to give Aurora HDR a go. It’s not a big investment and they have trial versions. If you do decide to take the plunge take advantage of the double discount using my code WOLFSON. Here’s a link.
Just be sure to have fun with it all!
Joel
Hi Joel,
i do suffer from a sort of grey cast over the image inside the aurora user interface. while the software is processing the edits made, the image kind of looks ok, after processing the grey cast snaps back over the image. the exported file does not suffer from the grey cast.
i wonder if you have experienced the same issue ?
i really have a hard time to decide if my editing is ok, cause the brightness and color of the exported file does differ immense to what the aurora hdr screen it displaying me.
Hi Marc,
Sorry for my delay- some comments from December suddenly popped up. I have not encountered the grey cast you mention. I have seen this upon initial import of raw images into some processors but usually it can be alleviated with adjustments. What I have seen is a milky/silvery and underexposed look. You’ll see this in my upcoming review of raw processors. It’s curious that you don’t see it on export. It sounds like it could be some incompatibility with Aurora HDR 2018 and your display card. Make sure you have updated to the latest version. If it still persists I would suggest sending contacting Skylum and give them the exact specs of your system including your graphics card/processor.
Hope this helps,
Joel
Hi Joel,
Just like you, I prefer to work in RAW.
So I enjoyed reading your article on Aurora HDR.
Please send me your RAW optimizer preset.
I’m shooting with Nikon D200 but I have to admit, as a professional photographer, I love shooting with my iPhone 7 Plus (in RAW!) even more!
Thanks,
Jan
Jan,
I just realized your comment never got posted. I hope you are enjoying using the preset I sent you when you posted this comment. 🙂
Joel