A Pro’s Story of the New Fujifilm X-Pro2
Updated Feb 7, 2017 See updates with red headings, green text
This post is the prologue for what has become my continuing series of the Fujifilm X-Pro2, XF lenses, and X-Pro Tour of images from my travels, stories behind the photos, and my thoughts and experiences with the Fuji X-Pro2 system in many different situations. Much of what I post applies to other Fuji cameras and the rest of the system (I posted Part 1 and Part 2 in May, 2016 Part 3 in June and Part 4 in Sept, and Part 5 in Dec) In the captions I provide the backstory of the shot along with technical info (non-tech folks just ignore the part at the end of the captions.)
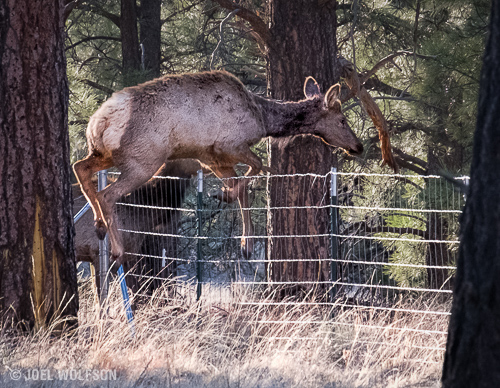
This is a brief bottom line story from my perspective as a full time professional photographer. I won’t go into every feature and setting as there are many solid reviews out there covering this. I want to address some aspects of real life use of the camera and especially aspects I haven’t seen addressed much in other reviews or profiles of the X-Pro2.
I have always loved using rangefinders. Though mostly Leica, I’ve owned and used many rangefinder cameras over the years. The Fuji X-Pro2 is an absolute pleasure to use. I love the OVF (optical viewfinder) when using lenses up to 56mm (85mm full frame equivalent.) And you can’t beat the ingenious “ERF” (electronic rangefinder). This is a small picture-in-picture window with a magnified view of the focus area in the lower right for critical focus.
It’s amazing and wonderful to be able to instantly switch to the EVF (electronic viewfinder) for a more conventional mirrorless viewing experience with longer lenses or just if you want to. This is one of the few digital cameras I’ve owned (I’ve been shooting digital since the early 90s) with useable JPEGs and I especially like the Acros option. This option is a digital simulation of Fuji’s renowned black and white film of the same name.
But wait, there’s more. The Fujinon lenses are exceptional, even the zooms. I’ve tested nine of Fuji’s XF lenses in the studio and in the field as well as used them for everyday shooting. I have the XF 10-24mm f4 OIS, XF 14mm f2.8, 23mm f1.4, XF 35mm f2, XF 56mm f1.2, XF 18-55mm zoom f2.8-4.0, and XF 55-200mmm 3.5-4.8, XF 100-400 f4.5-5.6 OIS WR and 1.4X. I also tested but ended up not keeping the XF 18-135 f3.5-5.6 OIS WR. It performs very well optically but I felt there was too much overlap with my other lenses. Who knows, maybe I’ll go back to it at some point. Although the first sample of my 18-55 performed well for the most part, it was de-centered enough to be a problem so I exchanged it. My replacement is superb. I got an exceptionally good sample of the 55-200 (or perhaps it is just an exceptional design.) I should note that getting a bad sample of a lens doesn’t alarm me. I’ve found as much and often more sample variation in Canon and Nikon lenses. I wish all these companies were more consistent but all these still have less variation than some third party manufacturers. All the rest are stellar too. I have to admit they are a bit neutral for me in character (rendering) compared to Leica or Zeiss lenses but I’ll take the fabulous quality. Of course, the character changes with film profiles set in-camera for JPEGs and the same with Raw files if you use Lightroom’s Fujifilm profiles under Camera Calibration. Another cool aspect of the in-camera profiles is that you can process the raw with one or more film profiles which creates a new JPEG with each iteration. You have to be set to shoot in Raw or Raw+JPEG to use this.
The Fuji X-Pro2 system is one of the best thought out systems with versatility second to none. It’s fun to use and is capable of outstanding quality, even when compared to full frame systems. But…
Two Edged Sword of the X-Pro2 Updated 7 Feb, 2017
The crux of the problems are twofold. First is Lightroom which has become interminably slow in recent years, particularly when rendering individual images on-screen when you want to scrutinize detail, check for sharpness, etc. Of course this is not solely a Fuji problem but virtually any recent camera’s files. If you don’t import large numbers of images using Lightroom or don’t care about the painfully slow screen rendering times then you should be fine. However, I use Lightroom for managing my 100,000+ digital images. See the workflow section below.
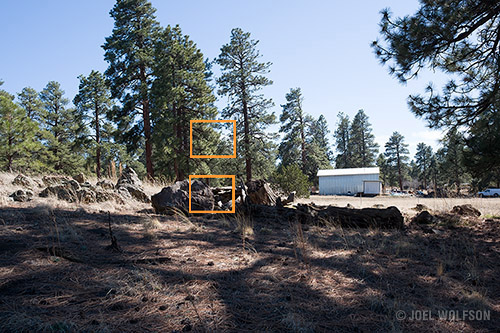
The second aspect is the lack of detail extracted from Adobe’s LR/ACR (Lightroom/Adobe Camera Raw) or even SilkyPix which is Fuji’s official software. If you want to avoid the now infamous X-Trans artifacts sometimes referred to as “worms” or “plasticy” then you must use other software to process your raw files like ON1 Photo Raw, Iridient Developer, Luminar, or Afinity Photo 1.5.x. Capture One is also alleged to do a good job but so far they have not supported lossless-compressed Fuji files, even through several new versions so at this time I don’t consider it a viable candidate (I will be posting an in-depth article comparing these processors- if you want to be notified you can sign up for my email news if you aren’t subscribed already.)
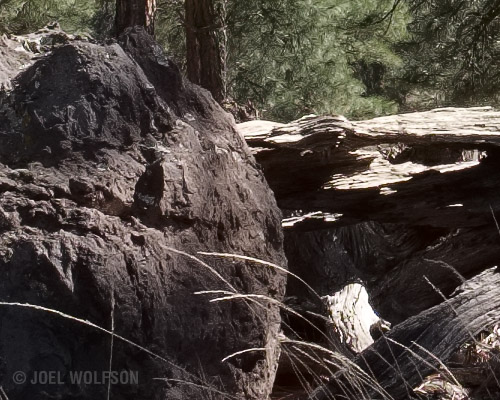
How obviously these artifacts appear is subject-dependent. If you only shoot people, it probably won’t be a big factor unless you want to see detail in every eyelash and pore in the skin. I have only seen occasional artifacts in people shots and mainly with areas of contrast such as rim and back lighting. With Lightroom or Silkypix, expect to get the “worm” artifacts instead of fine detail, especially in trees, grass, pine needles, leaves, or other greenery. Below I show examples of how using two different types of software for raw conversions affect the same file. The comparison is using the exact same raw file, one using Lightroom and the other using Iridient Developer.

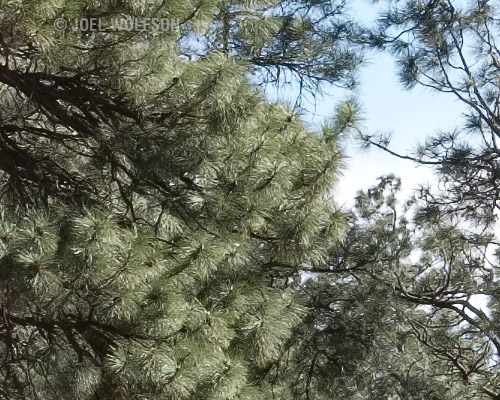
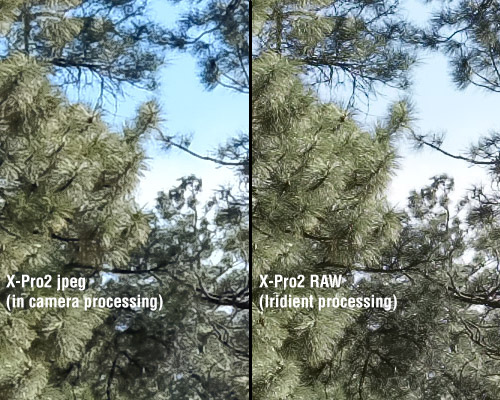
To keep all this in perspective, I commonly print and sell very large images. If you make smaller prints you are far less likely to see the artifacts. I did a comparison with a Sony A7 II (also 24MP but full frame) against a comparably outfitted X-Pro 2. In a 30×20 print you can see the difference if you look closely. When you go larger, especially if you up-res your files, the problem is exacerbated. For discerning viewers of fine detail in large prints, LR/ACR or SilkyPix won’t cut it.

New Workflow (aka Lightroom Workaround) Updated 7 Feb 2017
I intended for the Fuji system to augment my full frame Sony system which is based around the incredible A7R II. I don’t want to part with the Sony gear at this time but I really love using the X-Pro2 with its combination of rangefinder and EVF experiences in one camera.
Right now I am using the 2015.8 release of Lightroom CC (yes they really are still labeling it “2015.x” in 2017) and the import speed has been greatly increased since I first wrote this article. It is now just about as fast importing with Lightroom as Photo Mechanic. BUT it still takes Lightroom way too long to render an image which really slows down culling when you’re wanting to check fine detail quickly to decide on keepers.
I am currently testing several new raw processors including culling speed in ON1 Photo Raw (for a 15% discount use the link and code JW16ON1) so stay tuned for an article/post about this. The latest processors to accommodate Fuji X-Trans files are Luminar which I really like so far though they need to work on speed of processing, ON1 Photo Raw which I love because it can be an all-in-one solution of database, culling and editing. Right now it works with uncompressed format but they have a planned release of lossless-compressed compatibility this year. Then there’s Affinity Photo 1.5.x which is awesome competition for Photoshop, only cost $50 and does already open lossless compressed X-Trans files.
So here’s my current workflow:
- Import using Lightroom. Due to recent improvements in import times I prefer the interface, presets, and key-wording in Lightroom’s Import module over Photo Mechanic.
- Photo Mechanic for culling and rating. I can enlarge and inspect images very quickly (this step cuts a lot of time over LR) This is where I mark my keepers and rejects
- Use On1 Photo Raw or sometimes Affinity Photo or Iridient Developer for raw extraction and/or processing of my “selects” that I need for large prints. They all now handle both compressed and uncompressed raw X-Trans files.
Although motivated by Adobe’s slowness issues, I’ve come to like using Photo Mechanic because overall it really speeds up important aspects of my workflow, even with my Sony and other files. I can do my culling and image rating/selection far more quickly than in LR. No more waiting for previews to render when magnifying images either. The thumbnails and 100% views happen nearly instantaneously with Photo Mechanic. ON1 Photo Raw is being updated to 2017.2 Feb 9th, 2017. Not only are there great improvements in processing quality but also support for lossless compressed Fuji raw files. I’m waiting to see how they do with cataloging and database features in future updates. Even if I keep using Lightroom as a database, Photo Raw is so well rounded that it will still be more efficient to use it for other parts of my workflow.
BOTTOM LINE: There you have it. I love shooting with the X-Pro2 and its beautiful resulting files and with several new software products out it isn’t nearly as involved as a few months ago to work around Lightroom’s painfully slow image rendering and get the best out of the X-Pro system.
Epilogue: Fuji’s 2.0 firmware upgrade is impressive. Some manufacturers would make you buy a new camera to get the kind of useful upgrades Fujifilm included with a free firmware update. I’ll do a follow-up down the road with my impressions after using this system for a full year. In the meantime I’m loving the experience and quality and hoping Fuji and Adobe will up their game in terms of the fine detail extraction and workflow end of the image files.
A note about links and affiliations: Some of the links I provide are affiliate links (ON1, B&H) which means I get a small commission, with no additional cost to you, if you click it and end up buying something. It helps keep the lights on as well as supporting this blog and my other free educational resources and articles. So if you use them, thanks!
Happy Shooting Everyone!
Joel
Joel Wolfson is an internationally published photographer who loves teaching as much as shooting. He shares his 25+ years of experience as a working pro with other photographers and enthusiasts by way of his workshops, 1 on 1 training, webinars, articles, blog and speaking engagements. His technical articles have been translated for use in more than 30 countries yet he is best known for his artistic images of nature’s fleeting moments and unexpected views of everyday places around the globe. He is one of the pioneers of digital photography having conducted digital photography seminars for Apple and other corporations starting in the early 90s. His roster of notable clients includes numerous publications and fortune 500 companies. He currently works with great affiliates like Topaz Labs and Arizona Highways to have more avenues for working with those wanting to pursue their love of photography. His goal is to make learning and improving one’s photography easy, fun and rewarding.


Hello:
Great writeup. I fully agree with your findings on the raw conversion issues with LR/ACR. Your shot of the boulder is an excellent example of what I see also, and it drives me crazy. I had hoped that Adobe would step up and work on this with the announcement made last year, but it seems that nothing will be done.
I also agree that Iridient does the best job, but their tool has very little in the way of tools, and I have become attached to the tools that both LR and C1 offer.
For my work, including the X-Pro2, I have gone back to C1. The trick to C1, is you have to make sure you move the details slider (under the noise reduction settings) way off to the right from it’s normal position in the middle. This will bring out a lot more of the details and I don’t see the worms, I like to call it the watercolor effect or plastic look. You also may need to push the base sharpening also in C1. After running the images in C1, I also will do a final sharpening with either Piccure+ or Focus Magic both have deconvultion sharpening.
I love LR, as you can take Fuji files right into HDR and Panoramas or both, which C1 can’t do, but the files suffer terribly and once the damage is done, you can’t really get it back. When I do have to use LR, now I need the main sharpening low, in the 30 to 40 range and push only the details slider, and it only to around 60%, then hit the file with Piccure+.
It’s so tragic, that this issue can’t be resolved, as the color of the files is excellent and the range of the X-Pro2 is vastly superior to the X-T1 in the higher ISO ranges.
Thanks for the great review.
Paul Caldwell
Joel,
thanks for this review. A good read. I don’t know how many hours I’ve spent making changes to my workflow, changing file locations and LR preferences and finally trying to get my hands on some genuine magic fairy dust just so my PC wouldn’t start breathing heavily and slow to a crawl after editing 3-4 Fuji RAWs. This is an issue, and I’m ready to say it’s a big one for me. Unfortunately neither Fuji nor Adobe will openly speak about this with their customers, especially when they’re not pros. Now, we’ve had RAF for more than 4 years, and the improvements that they say they worked on were mostly baby steps (with one exception: Adobes interpretation of the Film Simulation modes is quite good). I guess there are only two things that might speed up the process of finding a solution: Fuji selling a lot more cameras, or a few very passionate Adobe developers who shoot Fuji…let’s hope for the best.
Michael,
You’re welcome and glad you enjoyed it. FYI: I was emailing with Victoria Bampton (she writes my favorite Lightroom Book- The Missing FAQ) about all this and she said “I know some of the Lightroom and ACR engineers shoot Fuji, so they have a vested interest, but I don’t know on timing.” I found this encouraging.
In the meantime, You might try my workflow in the post if you haven’t already. You can save a lot of time with Photo Mechanic for your initial picks, keywording, zoom in and scrutize, auto-renaming and downloading. Once I do all that in PM which is very quick- I then select everything and drag and drop to LR for import. You can let LR do the import while you’re away from your computer. But at this point you’ll have the lion’s share of your work done. Keywording/metadata, star ratings, and color coding will all transfer to LR. I’ve found this the most efficient way to deal with the otherwise painfully slow method of having LR do it all.
Cheers,
Joel
Couldn’t agree more about Reid Reviews. I’ve subscribed for years. Worth every penny.
Iridient Developer are working on a version for Windows. Should be out in a couple of months,according to ID.
Hi Joel
Really informative write up, thanks for sharing. I intend to do one as well on my site but from the perspective of a C1P user. I really do like it and suggest you try it as it also renders other files such as Sony and Nikon better than LR/ACR, IMO.
Also, I tried Photo Mechanic but found it slow and not as easy to use (and cheap) and customize as FRV (Fast Raw Viewer). I can scroll through 100 images in minutes and have it drop rejects into a toss folder, and keepers into an import folder as fast as I can tap the key. Nice bit of code that 🙂
Thanks again Joel, great site.
Hi and thanks for the kudos. Glad you enjoyed it. FRV is indeed fast and gives you accurate raw info. We all have our favorites! For my purposes PM’s ability to add metadata and keywords on the fly is important to me and it’s been quite fast. But whatever works best for you is the way to go. I certainly look forward to seeing your C1 perspective! Please email me when you post it. Cheers, Joel
Hi Joel, thanks for the great review! Did you also try Darktable or RawTherapee? How do they compare? Cheers,
Jan
Thanks Jan! I haven’t tried either of those. There are many options out there and whatever works best for you is the way to go. See my comments below for more elaboration about my reasons to keep Lightroom my main hub.
Hello Joel,
I am getting excellent results using LR6.5 tp process XPro2 files by applying what is now known as the Bridgwater technique -push the details slider to 100 and the amount to between 20 to 35 but no more. Alternatively, zero the sharpening sliders, export the file and do some High Pass sharpening in Photoshop or PaintShopPro.
I,too, love my X Pro 2 and have also been impressed by the output from my recently acquired X70.
Yours,
Hector
Hi Hector. Thanks for your comments! Your suggested techniques will indeed more clearly define the detail existing in the file. The real problem is the nature of that detail. Without using an alternative (to LR/ACR) raw processor, those details still exhibit the worm artifacts and the file just doesn’t contain as much detail (even with sharpening) as the same file processed with something like Iridient. As I mentioned in my article this isn’t an issue with smaller print sizes but when you make large prints, especially when interpolating up the file size the artifacts become more evident.
Yup LR sucks with FUji files, but I hardly think that should be a criticism of Fuji. C1 is a great alternative the catelogue function is now pretty much as good as LR and the files load super quick. My workflow is to store everything on a NAS drive and I work my files accross a network. I have very small load times even so. If I tried this with LR it would be impossible. Even with files from other cameras LR just won’t work accross a network anymore. Adobe need to fix up.
Thank you all for your great comments and suggestions. I just wanted to emphasize that this article is from my perspective as a full time pro. I have been using Lightroom for many years and have over 100,000 images catalogued with it. This, combined with many other positive aspects of LR (like being able to find the image I need out of 100K in under a second) give me many reasons to keep it as my main hub. Also a significant part of my living comes from selling large fine art prints so the artifacts and lack of detail from LR’s raw processing and can be significant for me. Additionally Fuji are not the only files I have so even if I could find a suitable alternative to LR it wouldn’t make sense to dump LR and start over for the sake of a small percentage of my image library. I added another photo in the post showing Fuji’s in-camera JPEG of the same capture. The caption explains my observations but the artifacts are also evident in Fuji’s own processing so this is a Fuji-Adobe combination thing. Watch for my follow-up in the future after I’ve used the X-Pro2 for several months.
Dear Joel, for me it’s also not so much the workflow and a feature comparison between all the raw converters. I also use LR for the most parts. What got me started was the fact that you already compared LR, Sikypix, and ID with regard to IQ and I haven’t seen such a comparison extended to open source tools such as dark table or rawtherapee. As you have the picture and your criteria already available, it would be great, if you could also try their IQ for FUJI raws. I can also understand that you have other things to do. Cheers, Jan
Hi Jan, Thanks for the further feedback. If you didn’t see it already I added a detail view of the in-camera jpeg and added a comment in this section about how it appears that Adobe is emulating the in-camera processing. If I ever have the time to add more comparisons, you’ll hear about it in an email (if you’re subscribed) or a blog post. I wish I had more time to allocate to such things but I do try to cover the most pertient issues. Thanks!
Thanks for the review- very informative
Digilloyd also comments on artefacts in the xpro2 and I wonder whether it is the fuji/adobe processing thats the problem here too and wonder if he tried using your suggestion of Irident
https://diglloyd.com/prem/s/ALLVIEW/FujifilmX/XPro2-artifacts-ClayPot-ACR.html?dglyPT=true
Thanks. Glad you found it informative- that’s my goal! I do believe it is largely a processing issue and if Adobe is indeed emulating Fuji’s in-camera processing, it makes sense. I don’t know at a deep technical level how difficult it is to avoid the artifacts but Iridient and others seem to have figured it out. Brian Griffith (Iridient) said it is challenging and there are always compromises. He also points out that standard Bayer type sensors have their own issues and compromises. Fuji’s intent with the X-Trans sensor is noble but the real world issues not so much. I suspect Adobe could do a lot to alleviate this. Because of Adobe being the defacto standard it affects more of us, especially pros that often can’t justify the time and expense of making big changes to their systems (in a general sense) and workflow. BTW, Iridient is just on the verge of releasing a new version that will also handle the compressed files- the first to do so besides Adobe.
Hi!
Try Capture One Pro 9 with Sharpening: Amount 190 ; Radius 0,6 ; Threshold 0,4 Noise Reduction: Luminance 20 ; Detail 75 ; Color 20
If you love the colors of Fuji:
Fujifilm RAW Converter EX 2.0
Outline Emphasis: 60-65
Detail emphasis: 30-35
False Outline Ctr: 0
Type: Pure Detail
Try this settings, there will be no more problems in detail.
Hi Joel, thanks for the feedback!
Hi Joel,
You’ve got a great site, with lovely images.
As a X-Pro1 fan, (I’ve written what I believe to be the longest X-Pro1 opinion piece on the internet!!) I’ve been reading your X-Pro2 articles with interest….
Surprised about your experiences with SilkyPix, I use the pro version of this software for my X-Pro1, and it does a great job… Is it really not up to the task with X-Pro2 files?
Regards
Adam
Hi Adam,
Thanks for the kudos and glad you have enjoyed my X-Pro articles. The only issue I have with SilkyPix is that the results are pretty much the same as with Lightroom. Buried in my X-Pro2 review I mention that I think this is by design though perhaps groupthink. If you look at the way the camera itself processes JPEGs you’ll see the worm and plasticy effects, particularly with certain subjects. Adobe and SilkyPix essentially duplicate this with their raw processing. You need to use something else such as Iridient Developer (I’ve read C1 and others work too) to extract all the great detail contained in the raw X-Trans files and avoid the worm effects. The worm effects aren’t a big problem with smaller prints but with certain subjects it can be noticeable. If you like the results from SilkyPix then keep on using it. We all have different needs so one product isn’t going to work for everyone. One of my biggest complaints is really Adobe’s issue- that Lightroom is particularly slow with X-Trans though it has sped up considerably with the latest update that came out last week.
I will check out your X-Pro1 review.
Cheers,
Joel