How To Capture Stunning Travel Images:
Tips and Techniques From A Pro
by Joel Wolfson
Part 1 of 2
In my last article (Traveling for Photography) I addressed the equipment side of travel photography including how to get your gear to your destination and back safely along with the images.
Now I’d like to share some tips and techniques I’ve developed from years of travel photography. Although most of the images are from my overseas travel you can certainly apply these to domestic travel too. One of the biggest challenges of travel photography is the fact that we are usually limited on time in any one place. We don’t often don’t have the luxury to shoot under ideal lighting, or wait for the right time of day, weather or other conditions. There are a number of ways to increase your rate of successful images in light of these challenges. I’ve also included lots of tips in the captions below the photos.
Good planning
Whether you prefer to be spontaneous or you are a meticulous planner, learning something about the region you’re going to will help your photography during your travels. If you are attending a well planned photography workshop then you will have far more time to concentrate on your images without having to worry about finding locations, navigating in unfamiliar territory, or even waste time trying to find good lodging, meals, etc. If traveling on your own, having done some research ahead of time can help quite a bit.
Why are You Shooting That?
My goal with every image is to tell a story or convey an emotion or try to show the viewer what it was like to be there. If you make this your goal with every shot you come back with a much higher percentage of great photos. Simply firing the shutter numerous times without thinking about what you’re shooting only yields a larger number of bad shots. Instead think about what compelled you to bring the camera to your eye in the first place and do what you can to convey that.
New Gear for Your Trip
We often use a big trip as a motivation to buy that new camera, lens or tripod. If you’re going to do this, do it long before you go and become thoroughly familiar with it until using it is second nature. Do all this prior to departing for your trip. Otherwise it may prove to be more of a hinderance than a help in coming back with great images. This is particularly true of a new camera. If you don’t have the time then hold off on the purchase- your success rate will be higher with equipment you know well.
It’s All About Light
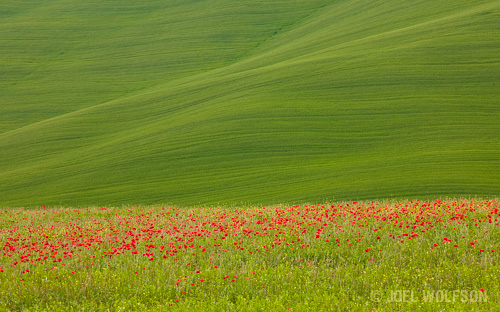
Without light we can’t make photographs. Let’s first consider the type or quality of light. Sweet light is that magical warm golden light when the sun is coming up or setting. Almost everything looks better in sweet light.
Even though you may only be in a particular area for a day or two, scout around and find an interesting location in your area whether it’s a landscape, architecture, town market or something else. Take a look around for possibilities on angles, lenses you might use, etc. You may even get some great shots during this process but the idea is to find out if your subject will be lit to make use of that golden light of sunrise or sunset. Bring a compass or use an app on your iPhone to figure out where the light will be that evening or the next morning. Remember that if you’re not willing to get up before the sun you’ll miss half your potential opportunities for sweet light.
Also try to plan your days around simply being out and about early and late to increase your chances of being able to use sweet light. You may not be able to do this every day of your trip but if you make a point of it, you will more than likely come back with some some shots you love.
Technology can help too. I use an app on my iPhone that tells me where the sun is at any given time of day and date for any location in the world.
Direction of Light
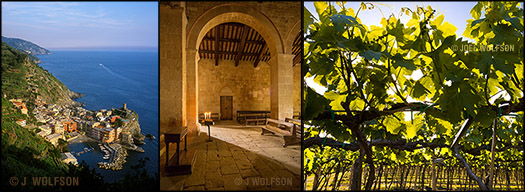
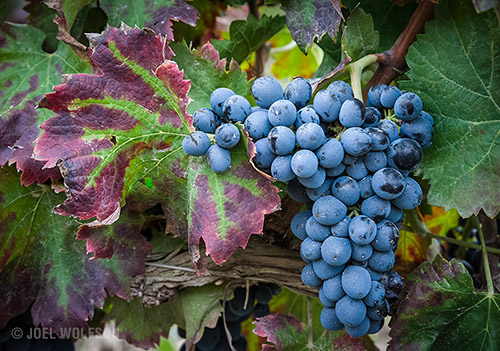
Every great photographer pays attention to the direction of light. Ask yourself where the direction of light is relative to your subject. Side light? Front light? Back light? And is it the best for my subject or should I change my orientation and change that direction of light. Do these grape vines look best lit from the front or should I move around and kneel down below them with light coming through? As a rule, front lighting is the least interesting, side lighting is more interesting and back light is the most interesting (and challenging) of all. We generally need frontal lighting for landscapes so this is why we seek the best type/quality of light which is around sunrise or sunset. One of the reasons we offer photo workshops in Tuscany and Provence is that those two places have a special quality of light that has attracted many of the greatest artists in the world for centuries. Essentially there is a lot of extra sweet light in the afternoon- much earlier in the day than you would see it in most other parts of the world. A little hard to describe so I’d just recommend going there yourself!
What About Midday Light?
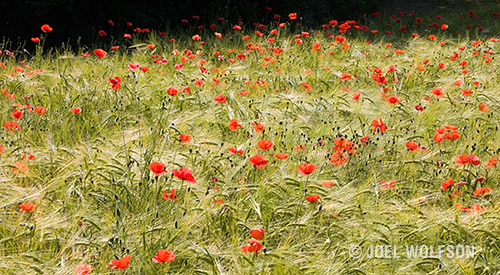
Although we’re thankful for sunny days when we travel, if you take away the golden light hours, most of the day is full of boring flat light with harsh shadows. There are still plenty of opportunities for capturing great photos.
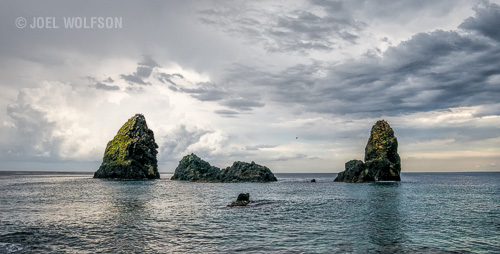
If shooting a broad scene look for some nice clouds in the sky and wait for them to move so you can frame them for a nice composition. If there are no clouds then try to use that vast area of blue as negative space to accentuate your main subject. Along with this look for a different perspective and/or vantage point. Try different lenses and think about other ways of augmenting the image with something as simple as using a different aspect ratio/format such as a panorama, vertical or square. If there’s nice contrast, tone or texture in the scene think about using black and white, and even try extreme or different angles or lenses. It can’t hurt to think about and try several different treatments of the same subject. It sharpens your visualization skills so you can see a final image in your mind’s eye as second nature.

If the sky isn’t that interesting you can always look for a subject and composition where you minimize or eliminate the sky.
Another idea is to go the opposite way from a broad scene and shoot smaller parts of a scene, perhaps architectural details or close-up shots.
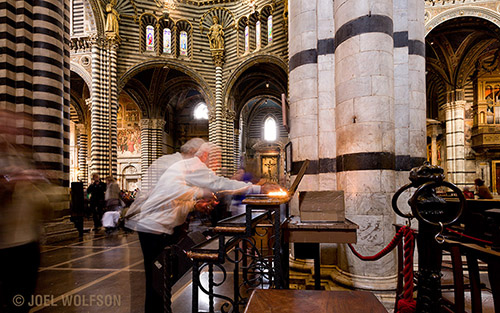
If you don’t like the light outside go inside. You can shoot inside a church or cool little shop or create a portrait of someone inside.
If it’s Stormy or Overcast- be patient and be ready
Stormy days can be great for landscapes or broad scenes because you can get some really dramatic skies or even rainbows. Just be prepared for inclement weather with a raincoat and a way to keep your camera dry. Be patient because when there are stormy skies you might get some great spot lighting or a bright scene against a dark background.
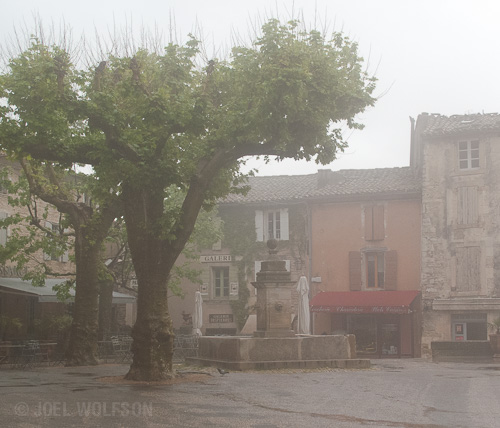
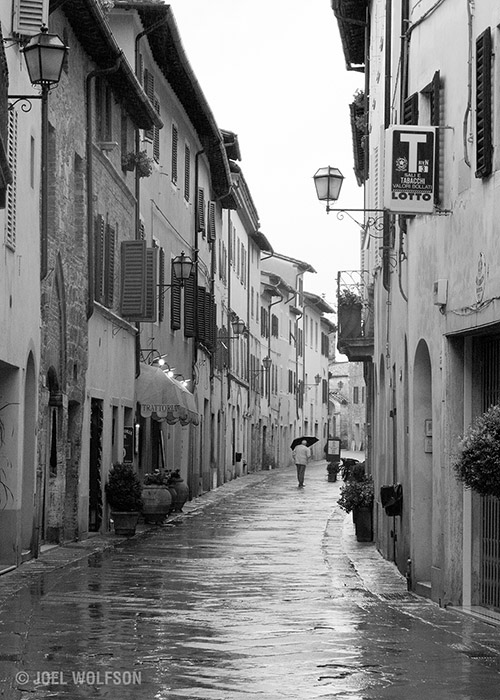
Don’t figure the day is a bust if it’s just plain gray, overcast or raining. It provides another type or quality of light: Diffuse light. That’s a great time to get some moody shots, eliminate harsh shadows, or shoot photos of people.
**Expanded Section**
Move In, Them Move In Some More
I’ve done a lot of critique and review sessions while conducting destination workshops over the years. The number one area I see for improvement is for folks to move in closer to their main subject. A good rule of thumb is to do your best to make sure everything in your photo has a reason for being there. Examine the whole frame before you shoot and just compose as tightly as possible for your main subject. When you see a beautiful scene or intriguing subject it’s easy to neglect the other elements in the viewfinder because you’re concentrating on what interests you. Below is a typical example.


In this first part of my two part series on travel photography I’ve offered some tips and techniques I’ve learned and used over the years to deal with different lighting conditions and weather we inevitably encounter while traveling. I’ve also offered a number of tips through examples of my images with explanations.
Part 2, Capturing the Culture looks at shooting at night, markets and food, thinking outside of the box, and photographing people.
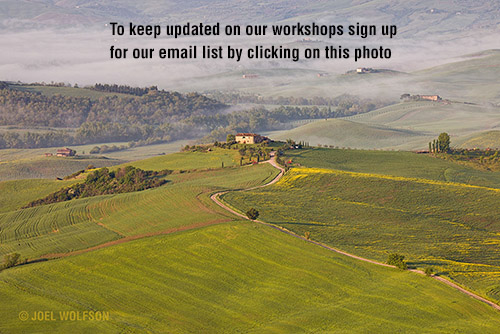
You can sign up for my newsletter here (I’ll notify you of articles and workshops)
In this blog you mentioned an app on your iPhone that tells you where the sun is at any given time of day and date for any location in the world. That is so valuable.
Could you please tell me the name of this app?
Thanks again for your latest blog.
Denny
I would like the iphone app info that describes where the sun is at any time of the day date for any location in the world
Thanks.
Tom
Hi Tom,
It’s called LightTrac and should be available on iTunes. It works on both iPhone and iPad. I think it’s a little easier to use on the iPad.
Joel, some how l missed your article on what lens and equipment you suggest. Can you resubmit to me? Thanks
in advance.
Marv
Hi Marv, Sure. Here’s the link. Thanks for reading the articles! -Joel
Several people have asked about the iPhone/iPad app I use to track the sun (and moon). It’s called LightTrac. It also works with Android and Windows. Here’s the website https://www.lighttracapp.com. Thanks all for coming to my blog! -Joel