Hidden at the Bottom- New Dehaze Tool in Lightroom
by Joel Wolfson
If you scroll nearly all the way down the palettes in the Develop module of Lightroom’s latest release, at the bottom of the Effects panel, you’ll find a wonderful new control slider called “Dehaze”.
Although it will provide an effect that seems to reduce haze in an image it has more uses than that. Really it’s a much more useful clarity slider than the one in the Presence section of the Treatment panel in Lightroom.
Some of you may remember Lightroom’s old Clarity slider before Adobe “improved” it, but really making it useless for more images than it helps. Thankfully, DeHaze can be used as a much better version of the Clarity slider to help add depth to an image.
In many cases it can save you the time of having to go into Topaz’s Clarity plugin (one of my most used plugins). The effect of Dehaze is similar to the effect you get using the micro and low contrast sliders in that plugin. It certainly won’t replace Topaz Clarity but it should mean fewer trips to Photoshop.
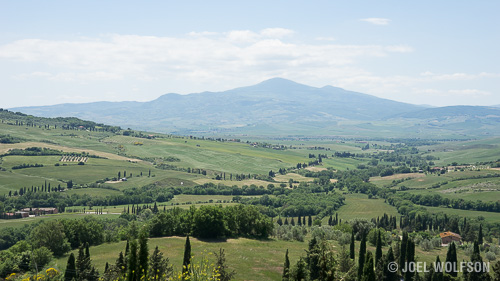
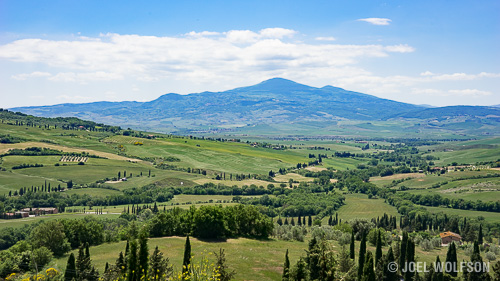
The slider goes from -100 to +100 with 0 being no adjustment. The positive direction reduces haze and negative numbers make your photo more hazy and muted. You’ll find you need to do some additional adjustments after using Dehaze in the positive direction, which is how most of us will use it. In many cases you will need to brighten your image with the exposure slider and decrease the saturation a bit, particularly in landscapes. Hazy landscapes will tend to have cyan skies and the Dehaze slider really saturates the skies. You may find yourself using the Hue targeted adjustment tool to change that intense cyan to a more realistic blue even after desaturating overall.
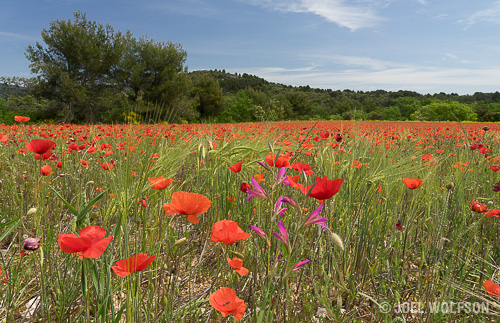
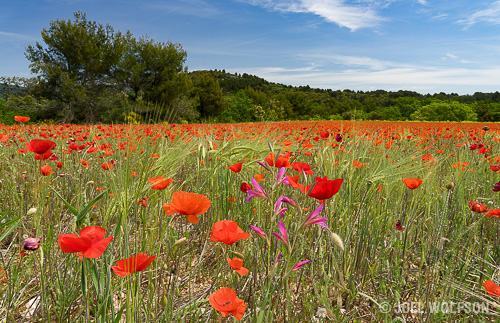
Check out my examples above and enjoy using this somewhat hidden but useful new slider in Lightroom CC 2015.

Joel Wolfson is an internationally published photographer that loves teaching as much as shooting. He has pursued both passions since college. He shares his 25+ years of experience as a working pro with other photographers and enthusiasts by way of his workshops, 1 on 1 training, webinars, articles, blog and speaking engagements. His technical articles have been translated for use in more than 30 countries yet he is best known for his artistic images of nature’s fleeting moments and unexpected views of everyday places around the globe. He is one of the pioneers of digital photography having conducted digital photography seminars for Apple and other corporations starting in the early 90s. His roster of notable clients includes numerous publications and fortune 500 companies. He currently works with great affiliates like Topaz Labs and Arizona Highways to have more avenues for working with those wanting to pursue their love of photography. His goal is to make learning and improving one’s photography easy, fun and rewarding.
Wonderful tip. I probably never would have found it.
Thanks
Joel,
When do you apply Dehaze in your LR workflow? At the end (where it’s located on the LR adjustment panesl), or near the beginning?
Hi Stephen,
Good question! It should really have been placed in the Presence panel. Generally I will apply it after doing typical raw file adjustments such as contrast and saturation and of course black/white point and exposure if appropriate. As I often say, raw is blah. Most of the time I use DeHaze I treat it experimentally and/or as a preview to what I might do with a more refined tool such as Topaz Clarity (now Studio Clarity Pack) or ON1’s Dynamic Contrast. Sometimes though, DeHaze by itself can do the trick assuming the usual corrections to exposure and saturation after applying it. Hope this helps.
Cheers,
Joel
Hi Joel, found your tutorials for using dehaze. Great pictures. I’m browsing the web for more info on photo editing so I also subscribed to your newsletter for more tips. Thanks 🙂 🙂
Hi Greg,
Thanks for the kudos and for signing up for my newsletter.
Cheers,
Joel